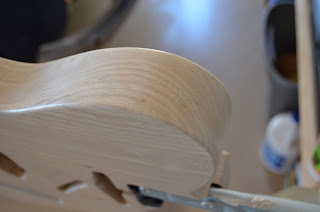
Here it is - the big one. Today we are going to spray the toner to make this blond finish butterscotch-ish.
I used lacquer thinned about 2:3, two parts lacquer to three parts thinner (maybe a bit more thinner than that), then added my teaspoon of white pigment, and then I added six drops of vintage amber and the secret ingredient was four drops of medium brown. The vintage amber was just a tad too yellow. This mixture came out perfect, I think.
I marked the side of a jar with my ratios for thinner and lacquer. This makes it easy to pour your ingredients the same every time.
Once again, make sure you mix all your ingredients somewhere else, then pour it into your gun.
My mixture turned out looking like coffee with creamer. MMMMM!
Don't forget your respirator and safety glasses! This stuff is NASTY! Even with the respirator, I was developing a nasty cough if I sprayed for more than an hour at a time.
Here's my first try. I sprayed with the grain, which helped hide any streakiness from my horrid technique. You're supposed to keep the gun the same distance from your work at all times, start and stop off the piece, and overlap your layers of paint by 1/2. I was holding my guitar with one hand and spraying with the other while standing outside in the wind, so - yeah, my technique was less than ideal. It is possible, though!
I started to get a run here, but instead of continuing spraying, I stopped, put the piece flat, and let it sit for a while. Lacquer is pretty forgiving. For the most part, it wants to flow out and make itself smooth, which is what happened here. Once it dried a little, I finished spraying the rest of the piece, and now you'd never know!
First coat on the neck. Needs a bit more, I think.
Some pictures of the back and front before I toned the sides, so you can see the difference there. Pretty crazy, huh?
And the final product. I think it looks just about right!
A word on toners - you should consider your usage of the guitar before you decide how much toner to add to your finish. Wood naturally darkens over time, and the lacquer I sprayed actually yellows as well, so if I were to leave this guitar out in the sun regularly, it might actually get much darker and much more yellow than I want. I am very particular about keeping my guitars indoors or in cases, however, so I felt comfortable spraying my finish fairly butterscotch-y right from the start. Some other builders have skipped the toner and just left their guitars in the sun for a period of time to achieve the same effect. The choice is yours.
Now all that's left is spraying clear lacquer (4-5 coats, 2 hours apart), then wet sanding and buffing and/or spraying a flash coat. I'll keep you updated! Then maybe I can finally put all the pieces together and get this thing set up to play some tunes!! Can't wait!


